- Home
- Movie Making Course
- Stage Makeup
Phase 12: Learn To Apply A Natural Makeup Look For Your Screen Actors
Phase 12 is going to teach you how to apply stage makeup for screen and stage acting. Everyone knows that much time is dedicated to applying a natural makeup look on actors before professional shoots.
Whether the character is as subtle as the extra in the corner or the make-up look needs to be as in-depth as the ugsome scar on Grisell Dacre, here is a complete guide to help you make your actor’s face shine! This phase will teach you a step-by-step guide to stage makeup including how to apply:
Some of the links in this phase use affiliates including Amazon.
A Quick Note About Movie Makeup:
Stage makeup is applied to ALL ACTORS. That's right, men and women, boys and girls. That is why it is very important to use this guide.
It is subtle enough to be almost unapparent in film. But it is essential to defining key facial features!
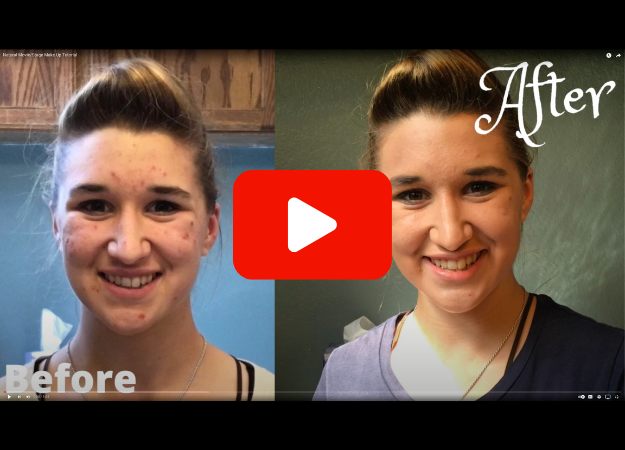
Start with a quick run-through here…
Task 1. Start With An Even Color By Applying Foundation
It is most important to start your artwork, any kind of artwork, on a clean canvas. Make sure to have makeup wipes for your actors at your shoots. Sometimes this can dry skin out so you should have lotion handy if they are comfortable using it.
After they have cleansed their faces, you can apply foundation.
This step makes the skin look smooth and consistent, especially on camera. We use Maybelline Dream Velvet because of its excellent blending quality.
It is a good idea to test the color on the wrist of the actor so you don’t tan them or make them sickly pale (unless, of course, that is the desired look.)
Choose the closest color you can but don't sweat it. If the color does not quite match their skin tone, that's fine. You can blend the jawline and some of the neck to help cover it up.
We always have about 3 different tones (light, medium and dark) and you can mix darker colors with lighter ones to make a perfect match.
It's easiest if you can tell actors to remember their color tone so that they look consistent all throughout the film. Or, you can write it down and keep it in your make-up box.
The tones that we have on hand for the Maybelline Dream brand are 90, 50 and 10. 90 and 10 can be used to mix and 50 is a common color match. Think dark skin is 90, olive skin is 70, white is 50 and really pale is 10.
You can use your hands to apply the foundation but a makeup sponge applies more evenly and makes blending easier (and sometimes makes actors feel more comfortable).
Task 1 Checklist:
Apply and match foundation following these easy steps:
1. Start with having the actor clean his face with a makeup wipe.
2. Match the foundation with the actor using the inside of his wrist to match.
3. Apply the foundation using your hands or a makeup sponge.
Task 2. Bring The Color Back To Your Actor's Face By Applying Contour
Now is the time for contour.
Since the foundation makes everything one flat color, the goal of this step is to define the actor’s features. You are now going to emphasize the:
- Jaw,
- Cheeks,
- Temples,
- Nose,
- Forehead,
- Ears
Here's a quick picture going over what you are about to do:

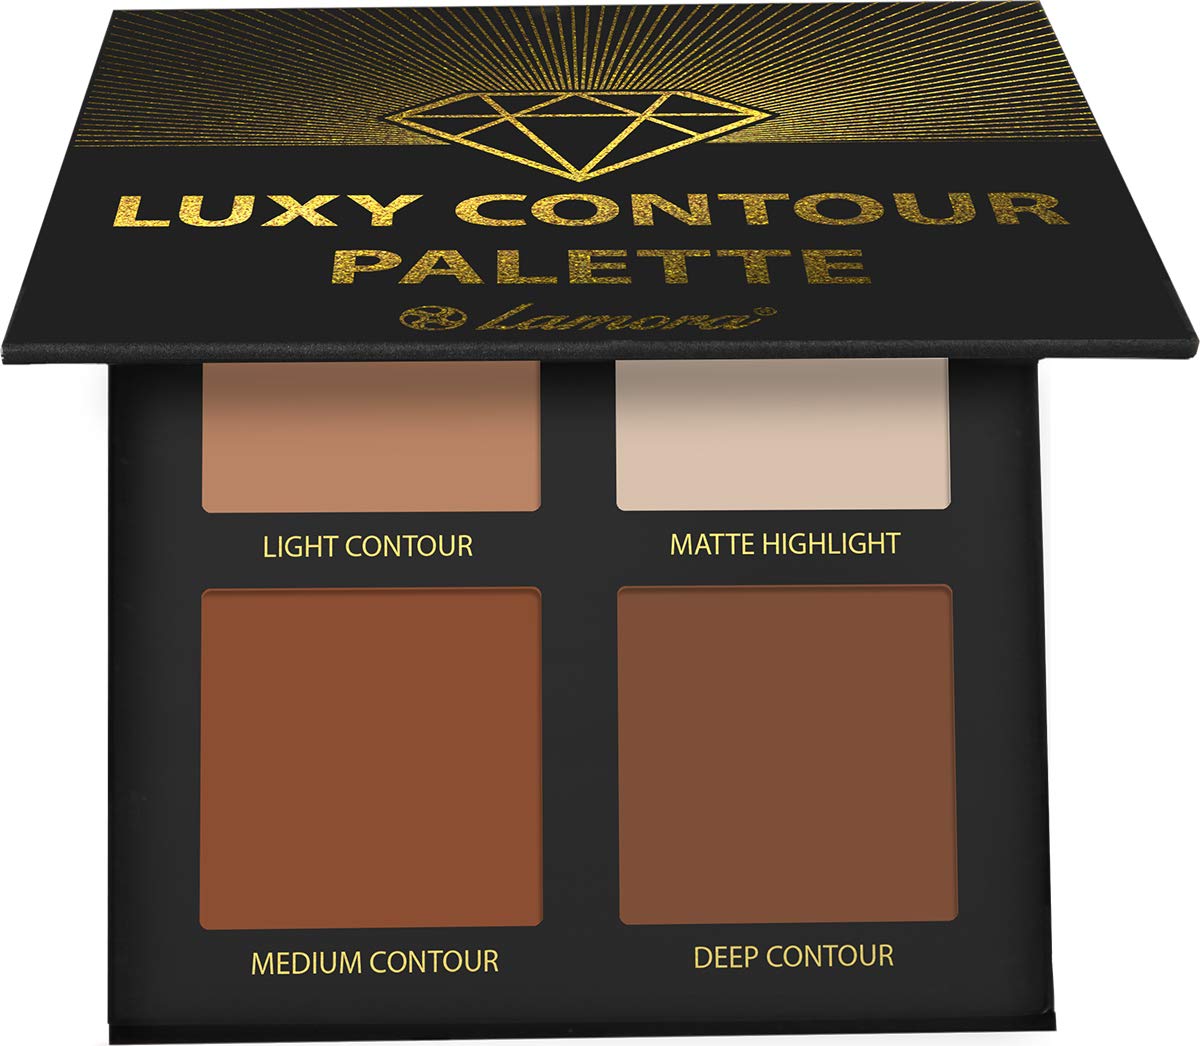
We don't have any particular favorite brand to use for contour. Any palette that has a bronzer, highlighter and contour will work. Apply the contour (lighter bronze) to the lower cheek bone and jaw-line like a horizontal V.
Using the bronzer, apply to the temple. Go light here. If you get too much on the temple it is very hard to blend in.
You don't want your actor to end up looking like he got in a fist fight and has developed a severe bruise on both his temples.
Use another sponge to blend the harsh lines.
Next apply the white powder to the ears, forehead, nose and chin. Be careful here if you are using a highlighter pallet.
If you get too much on it will appear "sparkly" or "glittery" on camera. Go very light or get a light colored matte palette like a finishing powder to use as highlighter.
Apply a pink blush to the apple of the cheeks, right below the eyes. Once you are done with all the powders, do one more run with the brush, blending everything in.
Task 2 Checklist:
Define facial features with these steps:
1. Apply contour to the cheeks in the shape of a horizontal V.
2. Apply bronzer to both temples.
3. Apply highlighter to the forehead, nose, chin, and ears.
4. Define the cheek bones by applying blush to the apples of the cheeks.
5. Blend everything in!
Task 3. The Eyes Are Windows To The Soul And Can Tell A Great Story, So They Need Defined As Well As The Lips
The make-up for the eyes, especially in older film genres, should be most subtle, barely noticeable even. Men are not an exception. This, like contouring, brings out the features.
The eyes are the windows into the thoughts and feelings of the performer so they need to look good.
Browns and neutral colors should be used for this natural makeup look. Apply a light shade on the entire top of the lid and a darker shade on the lower.

Then apply mascara. Once again, this is important in making the features of the eyes pop. So this should be applied to men and women alike. Try to have a mascara that will not be repulsive to the men. Avoid pink bottles that are from CoverGirl.
Hands down, Mary Kay is the best!
Similar to how the foundation makes the entire face one flat color, applying eye shadow puts powder on the eyelashes and makes them look white. Mascara makes them appear to be black again. A very light coat should be enough.
The lashes don't need to be plump and full unless it is intentional for a particular character.
Finally, apply a subtle shade of lipstick. This brings color back to the lips after foundation may have chased away the natural color. Like the mascara, tinted lipbalm is more acceptable to guys than a light shade of lipstick.
Dab the lips after applying lip balm with a tissue. This gets rid of any gloss that will end up making them look shiny on screen.
Task 3 Checklist:
Make the eyes and lips pop with these steps:
1. Apply eye shadow, a light shade for the upper eye lid and a darker one for the lower lid.
2. Apply a light coat of mascara to the eye lashes.
3. Put some subtle lipstick on the lips.
Task 4. Get The Right Shape For Eyebrows Depending On Whether You Are Working With An Actor Or Actress
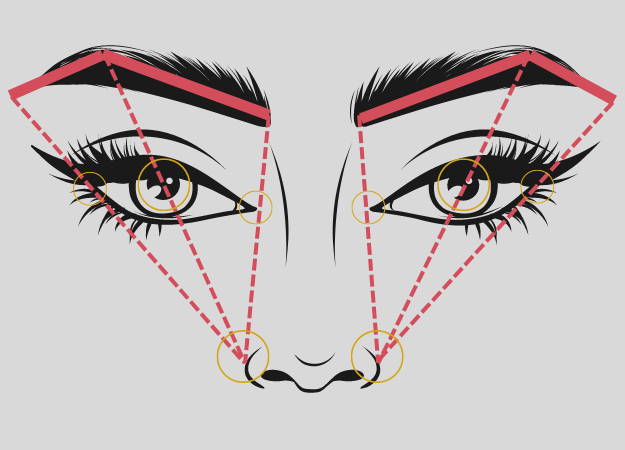
Now its time for the eyebrows. For ladies use a 3 point system to make the perfect brow shape. Using a make-up brush, mark out the 3 points in reference to the edge of the nose. See diagram below.

Point #1 goes inline with the nose and the far edge of the eye.
Point #2 goes inline with the nose and the center of the pupil. This is the "arc" of the brow.
The final point, point #3, is inline with the nose and the far inside of the eye. Using a brow brush, fill in the lines and add to the brow edge if necessary.
For men, the line is simpler. It's straight. If there is a natural arc work with it but don't emphasis it. This is a natural makeup look and you don't want it to be noticeable in the film!
Task 4 Checklist:
Get the eyebrows right for an actress by:
1. Marking out the three points
2. Go from point to point with a thin line of eyebrow makeup
3. Fill in
For actors:
1. Make a line straight out. Fill in.
Natural Makeup That Looks Great On Both Stage And Screen
I hope this satisfies every natural makeup look that you need for stage and film. This is the process we use on all our actors at every shoot. It is an absolute must to apply make up to every actor and actress at every shoot.
This makeup routine isn't a heavy look. It's just something that emphasizes features. Now that you have mastered (or at least understand the basics) of lighting and makeup, you are ready to learn how to:
Have Some Makeup Questions?
Did I miss something on this page? Do you have any more questions about your current makeup routine, special effects makeup, movie makeup in general? Please leave it below. I'd be happy to help you with them!
Even if you don't want to ask a question and just want to tell us about what you are up to with your natural makeup, we would be happy to hear about it and celebrate your accomplishments with you. So, please, don't hesitate to tell us what you are thinking!


